Recipes

Standing the Test of Time With Tanqueray London Dry Gin

As minutes move forward we find moments and things that will stand the test of time. Take the song “Yesterday” by the Beatles, “I Have a Dream” by Martin Luther King, grandma’s famous lasagna recipe, or heck what about Toronto Raptor Kawhi Leonard’s buzzer beater in Game 7 vs the Sixers. These are all things that will be talked about and enjoyed for years to come no matter how long ago it happened.

Although gin isn’t normally included in lists of this nature, I would argue that it very well should be especially when it comes to a long-standing classic like Tanqueray. Its founder Charles Tanqueray created this gin all the way back in the 1830s over 180 years ago, and to this day it is still enjoyed by millions of people worldwide. On top of that, they are still winning accolades in 2019. For the 7th year in a row, Tanqueray has won the “Bartender’s Favourite Gin” award as voted on by the World’s Top 50 Bartenders (2019 Drinks International Annual Bar Report).

The one thing that all these moments and things have in common that allow them to stand the test of time is quality. Quality in the music notes on a page, the words behind a motivational speech, ingredients in a family recipe, or just a generational sport talent. It’s what what makes something last beyond the years of you and I. Tanqueray is no exception.

Charles only used the finest quality botanicals to perfect his gin recipes. In fact, he created over 300 gin recipes that inspired all the Tanqueray variants we have today. It didn’t come easy though. Charles experimented with many ingredients, tasting only the finest botanicals from all around the world. After extensive trials, he discovered a perfectly balanced recipe that combined a rich, full flavour with a bold and invigoration taste. This ultimately led to the birth of what we know today as Tanqueray Gin.

Most gins are mixed with tonic water. Tanqueray London Dry Gin has distinct flavour profiles that make it truly unique and versatile! The variant I really fell in love with was their classic London Dry gin. It consists of four perfectly balanced botanicals that combine to produce one unmistakable taste. My favourite part of the Tanqueray London Dry Gin is how versatile it is and how easy it is to switch it up by just choosing a different garnish to go along with it.

The signature way to enjoy the Tanqueray London Dry Gin is just with tonic water and then garnished with a lime. You will find here below this signature recipe for you to try at home, and I also included two other quick variations with lemon and cucumber garnishes that will switch up the flavour profile, but still stay true to its strong heritage and taste.

Tanqueray London Dry Gin Signature Recipe

IMG_5499-01.jpeg
  • 1.5oz Tanqueray London Dry Gin

  • 3 oz Premium Tonic Water

  • Garnish with a Lime

  1. Add ice into glass.

  2. Pour Tanqueray London Dry Gin over ice

  3. Add tonic water

  4. Garnish with lime

Tanqueray London Dry Gin With Cucumber Garnish

IMG_5439-01.jpeg

Tanqueray London Dry Gin with Lemon Twist Garnish

IMG_5469-01.jpg

Happy to be a partner with Tanqueray this summer because whether you’re hosting a summer party for your friends this year or just drinking for one (no judgement here!), any of these Tanqueray London Dry Gin cocktails will do the trick. Let me know below which one of these cocktails is your favourite, or better yet if you created your own way to enjoy it I would love to know that too! Remember to enjoy responsibly, whether it’s 1830 or 2019, because Tanqueray will still live on one glass bottle at a time. Cheers!
Celebrating Lunar New Year with a Pork Spring Rolls Recipe using DuBreton

Celebrating Chinese New Year with my family is always a momentous occasion. We celebrate the beginning of a new year on the traditional Chinese calendar marked with special gatherings with family and friends that's ALWAYS accompanied with lots and lots of delicious food!

With 2019 being the Year of the Pig, you just know that pork is going to be on the dinner table. One of the dishes that is always a hit in my family are Spring Rolls, so of course to mix it up this year I added pork as the special ingredient!

I partnered with DuBreton and used their Organic Pork products to make my "Pork Spring Rolls" truly stand out. They're a Canadian company that's at the forefront of the organic and Certified Humane pork production in North America, where their pigs are raised crate-free, fed a high-quality grain diet, with no antibiotics used whatsoever.

They offer a full range of organic pork products that include ground pork, sausages, bacon, and pork loin cutlets.

RECIPE:

500g DuBreton Pork Loin Cutlet, thinly sliced
2 Garlic Cloves, minced
1 Red Onion, chopped
1 cup Cabbage, shredded
2 Medium Carrots, shredded
1 cup Bean Sprouts
1/4 cup Coriander, chopped
2 Tbsp Soy Sauce
10 sheets Spring Roll Wrapper
Salt and Pepper to taste

DIRECTIONS:

➡️ Mix pork, garlic, and onion into frying pan on medium heat until pork is cooked through.

➡️ Add in cabbage, carrots, bean sprouts, coriander, and soy sauce and cook for another 5 minutes. Place spring roll mixture in a bowl and let it cool.

➡️ Put mixture into center of the spring roll wrapper. Fold in the edges and roll into a rectangular parcel.

➡️ Heat 4 to 5cm of oil in a pot and fry spring rolls until golden brown. Serve with Sweet Chili dipping sauce.

Available at major grocery stores including T&T Supermarkets, Whole Foods, Longo's, and Metro. I hope everyone enjoys these Pork Spring Rolls and have a happy Lunar New Year!!

Going to Duck School at King Cole Ducks!

It’s that time of year again. The time where we reflect on the past 365 days of all our highs and lows as we ring in the new year. In what seems like a blink of an eye, 2018 has come and gone. For some it may be relief that a fresh start is on the horizon. For others it may be a year we don’t want to let go of with all the milestones and fond memories that were made. No matter what side you may fall on the spectrum, a new year can be a signal for new beginnings and new goals to achieve. Admittedly, my new year’s resolutions are not always achieved by the end of a year, but setting a few at the start is always something I aim to do. In fact, five years ago one of my new year’s resolution was to finally start up my food blog and Instagram account, which became the birth of the website and account The Everyday Foodie. Now with almost 30,000 followers I am beyond grateful that I followed through with that new year’s resolution, and kept it going five years later giving me this amazing platform and community that allows me to do what I love each day.

Now that it’s 2019 it’s time to pick another new year’s resolution! As a food blogger I often get asked if I’m also a good cook. The brutally honest truth is…. not at all! I’m a superstar when it comes to eating. I’m pretty good at taking pictures of it too. But when it comes to cooking that’s a whole different story. Cooking for me has always posed a challenge. I’ve always wanted to learn new recipes and sharpen some cooking techniques, yet year after year it’s something I’ve put on the side. But not this year. Not in 2019!

I decided this is the year for me to turn it around, and what better way to make sure this new year’s resolution gets off to a good start then by enrolling in a cooking class! Located in Stouffville, Ontario King Cole Ducks has almost 70 years of experience in producing duck products spanning four generations in a family run farm. With customers all around the world, King Cole Ducks is the brand of choice with chefs across the globe and of course with chefs here locally as well.

With so many well-established chefs that trust and use their products, King Cole Ducks offer a cooking class called “Duck School.”It’s a night full of food and fun where you get to learn how to cook duck like a pro from a roster of talented local chefs right on the duck farm itself!

IMG_1923-01.jpeg

The class I enrolled in was led by Chef Forrest Liu, the Executive Chef at Terre Rouge located in downtown Markham. Born and raised in Shanghai, Forrest began his career at a young age, interning at Three on the Bund by Jean Georges, becoming the first ever intern hired at the Shanghai Flagship. He then decided to move to Canada to complete the Culinary Management program at George Brown College, where he then landed jobs at some of the most renowned kitchens in Toronto including One Restaurant, Canoe, George, Lee Restaurant, Carmen’s Steak House, and Toca at the Ritz Carlton. With his experience and expertise there was no better person then Chef Forrest Liu to teach me how to cook in my very first cooking class experience!

Below you will get to see the three duck dishes he taught and made for the class, which included a soup, appetizer, and entree. I also included a few duck recipes that I’ve learned from Chef Forrest Liu that will surely be useful to have in anyone’s recipe arsenal at home. Recipes that I myself will attempt to re-create at home as part of my 2019 new year’s resolution!

IMG_1934-01.jpeg
IMG_1935-01.jpeg
King Cole Farms Duck Soup - Braised Duck, Taro, Vermicelli, Baby Bok Choy

King Cole Farms Duck Soup - Braised Duck, Taro, Vermicelli, Baby Bok Choy

King Cole Farms House Smoked Duck Breast Salad - Baby Beets, Persimmon, Blue Cheese, Arugula, Quinoa & Lemon Parmesan Dressing

King Cole Farms House Smoked Duck Breast Salad - Baby Beets, Persimmon, Blue Cheese, Arugula, Quinoa & Lemon Parmesan Dressing

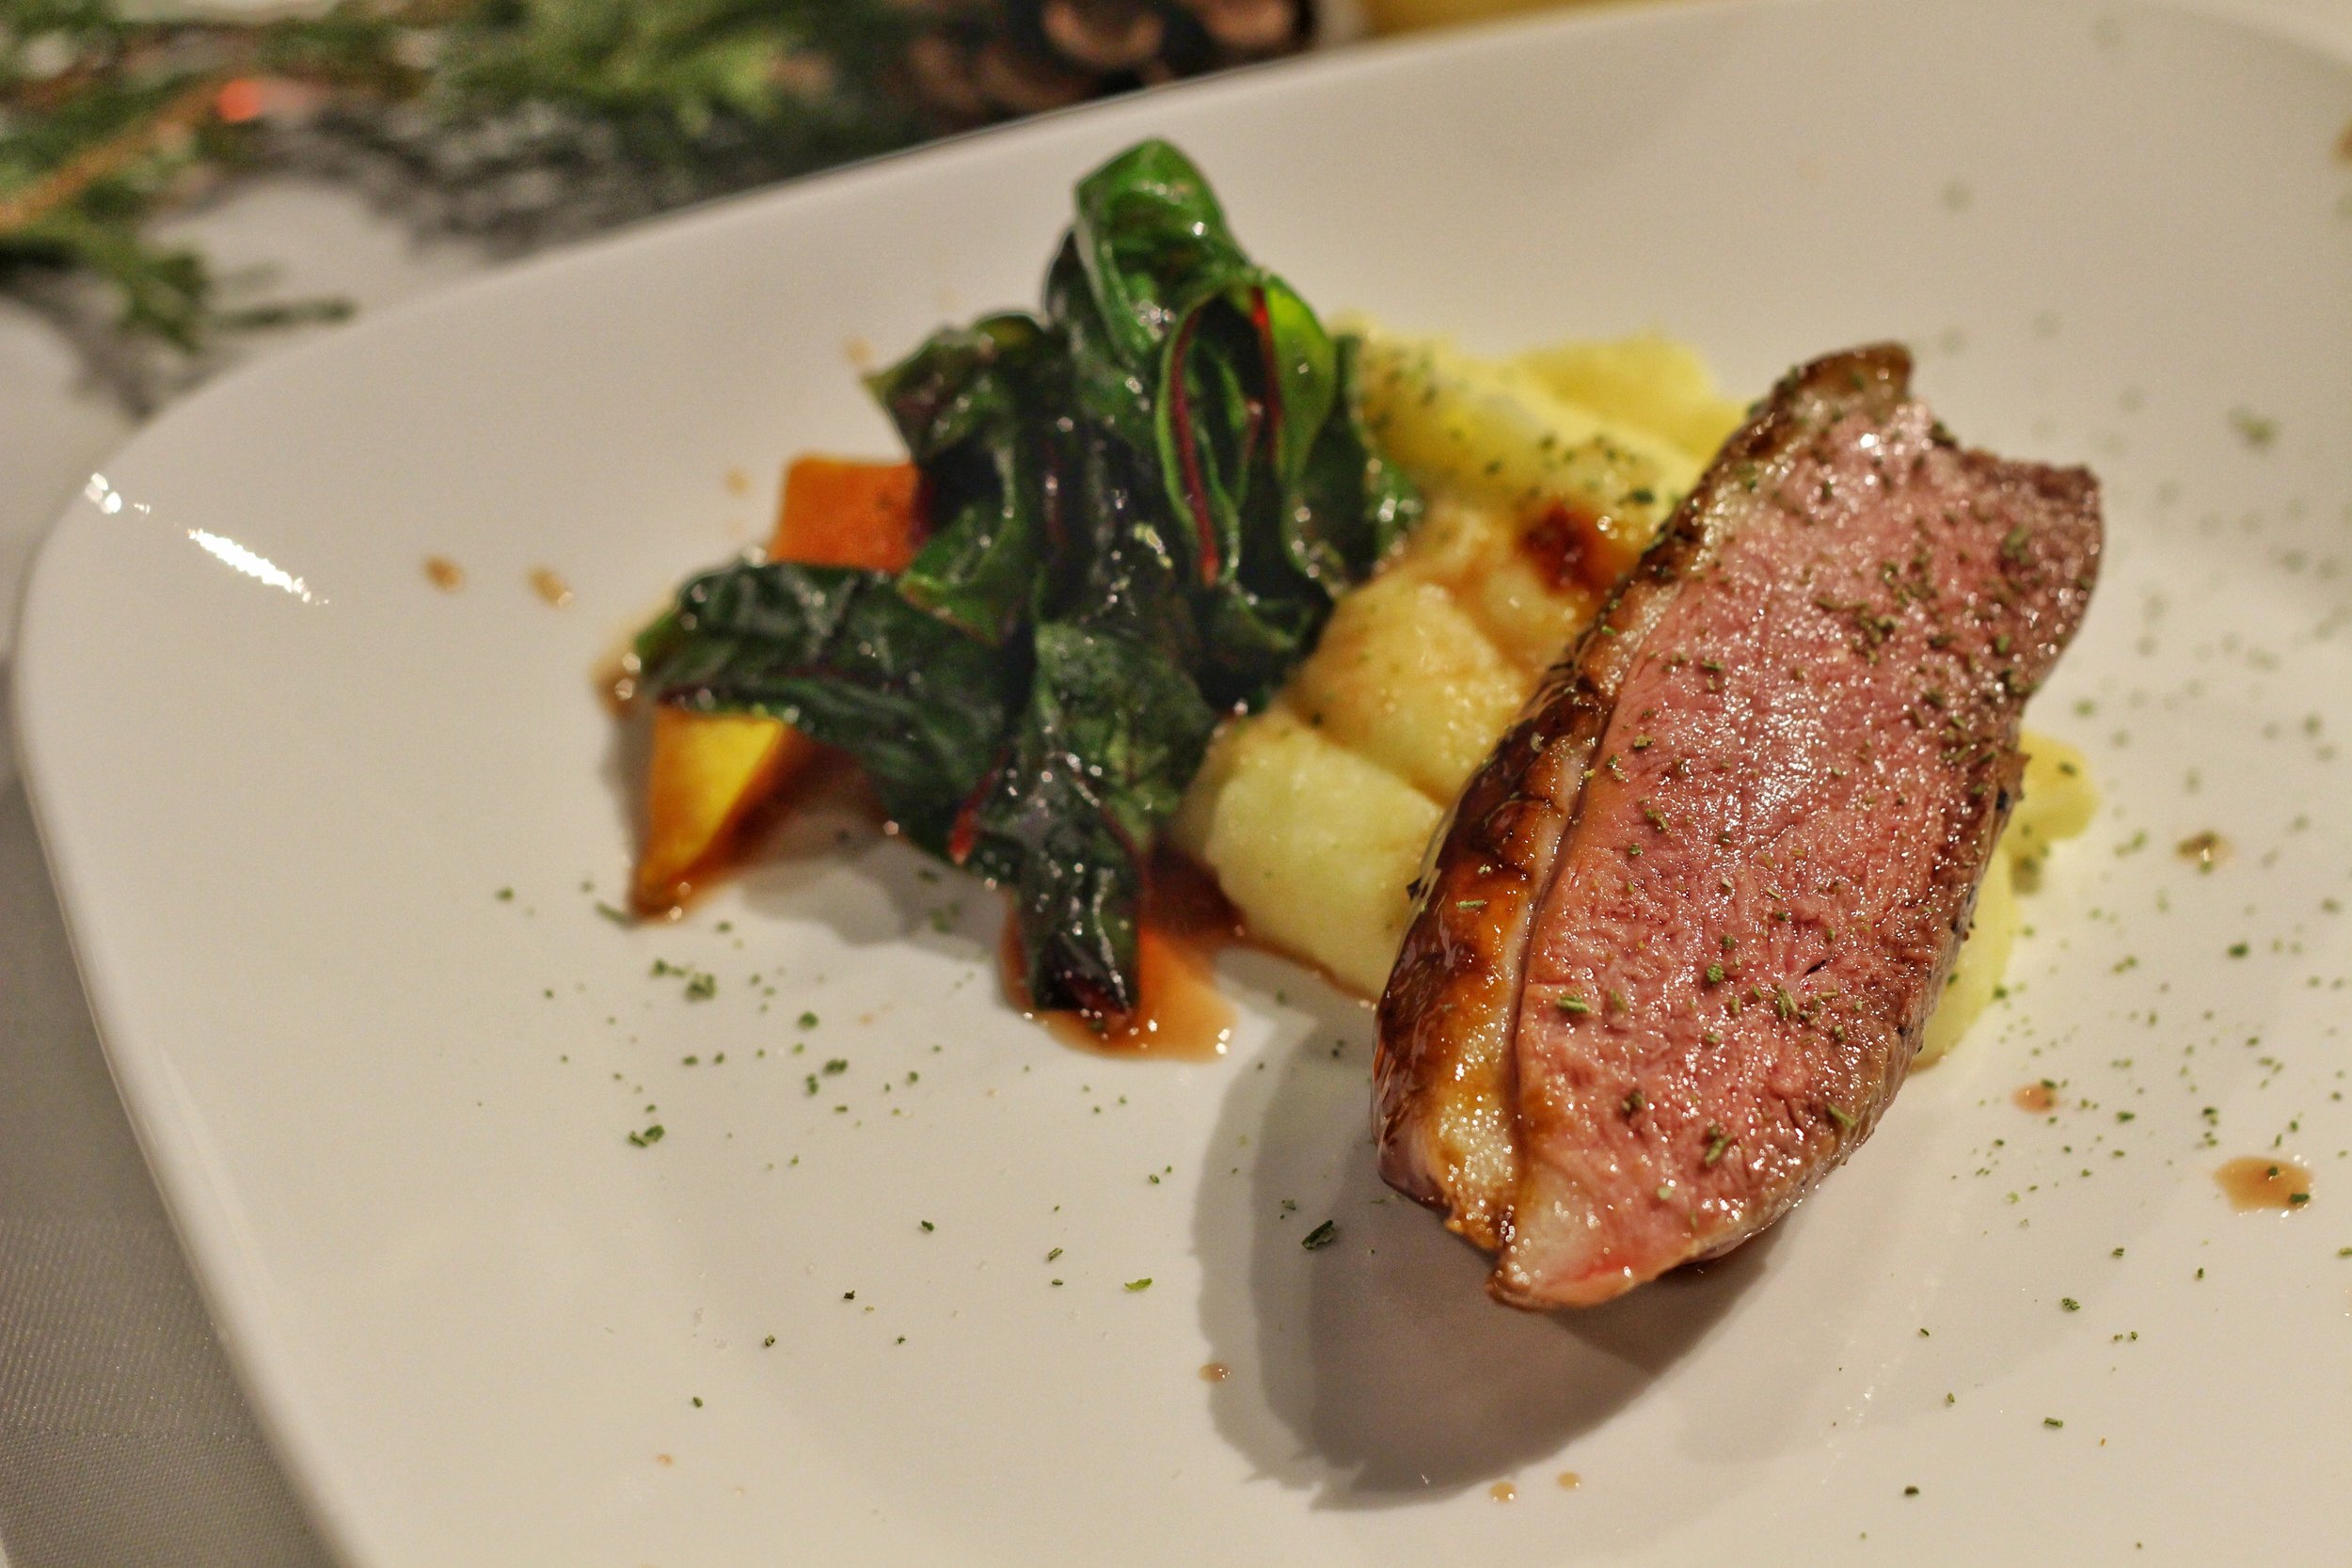
King Cole Farms Seared Duck Breast - Garlic Mashed Potatoes, Roasted Acorn Squash, Grapes, Swiss Chard, Verjus & Rosemary Powder

King Cole Farms Seared Duck Breast - Garlic Mashed Potatoes, Roasted Acorn Squash, Grapes, Swiss Chard, Verjus & Rosemary Powder

Braised Duck Soup

Ingredients:

1 Whole Duck
15L Water
50g Ginger, peeled
1 bunch Green Onions, chopped
3pc Garlic
2pc Bay Leaves
100g Cooking Wine
10g Goji Berries
300g Baby Bok Choy
200g Vermicelli
1pc Taro, cut into 1” cubes
Salt and Pepper to Taste

Directions:

  1. Put duck into stock pot and add 15L water. Bring to a boil and skim the stock until it is clear.

  2. Add ginger, green onions, garlic, goji berries, bay leaves into stock pot and simmer at medium heat for 4 hours.

  3. Check the duck (the meat should be falling off the bones). Add the taro and simmer for 15 minutes

  4. Add baby bok choy and vermicelli for another 5 minutes

  5. Season to taste

Duck Fat Mashed Potatoes

Ingredients:

400g Potato
150g Cream
50g Duck Fat
50g Butter
Salt and Pepper to Taste

Directions:

  1. Peel the potatoes and cut into 1” cubes as much as possible into stock pot.

  2. Add water and salt into stock pot. Bring the water to a boil. Simmer on medium heat for 15 minutes or until soft.

  3. Strain the water and put the potato in the potato ricer. As you rice each round, add a small amount of butter and duck fat so everything can be mixed well together

  4. Add cream to finish and season with salt and pepper.

IMG_1957-01.jpeg

Duck School is a two hour class. The evening includes the lesson, a full dinner, and a duck goodie bag to take home for only $75. These are going to be skills and recipes you can keep and use forever! If you are also looking to brush up on your cooking skills this 2019 as your new year’s resolution, or just something you want to check out later on in the year visit HERE to book your spot at their next class! They do fill up fast so be sure to reserve your spot before it’s too late.

Have an amazing 2019 year everyone! Looking forward to what’s ahead!

The Market & Co Experience at Upper Canada Mall - How To Make Kombucha At Home

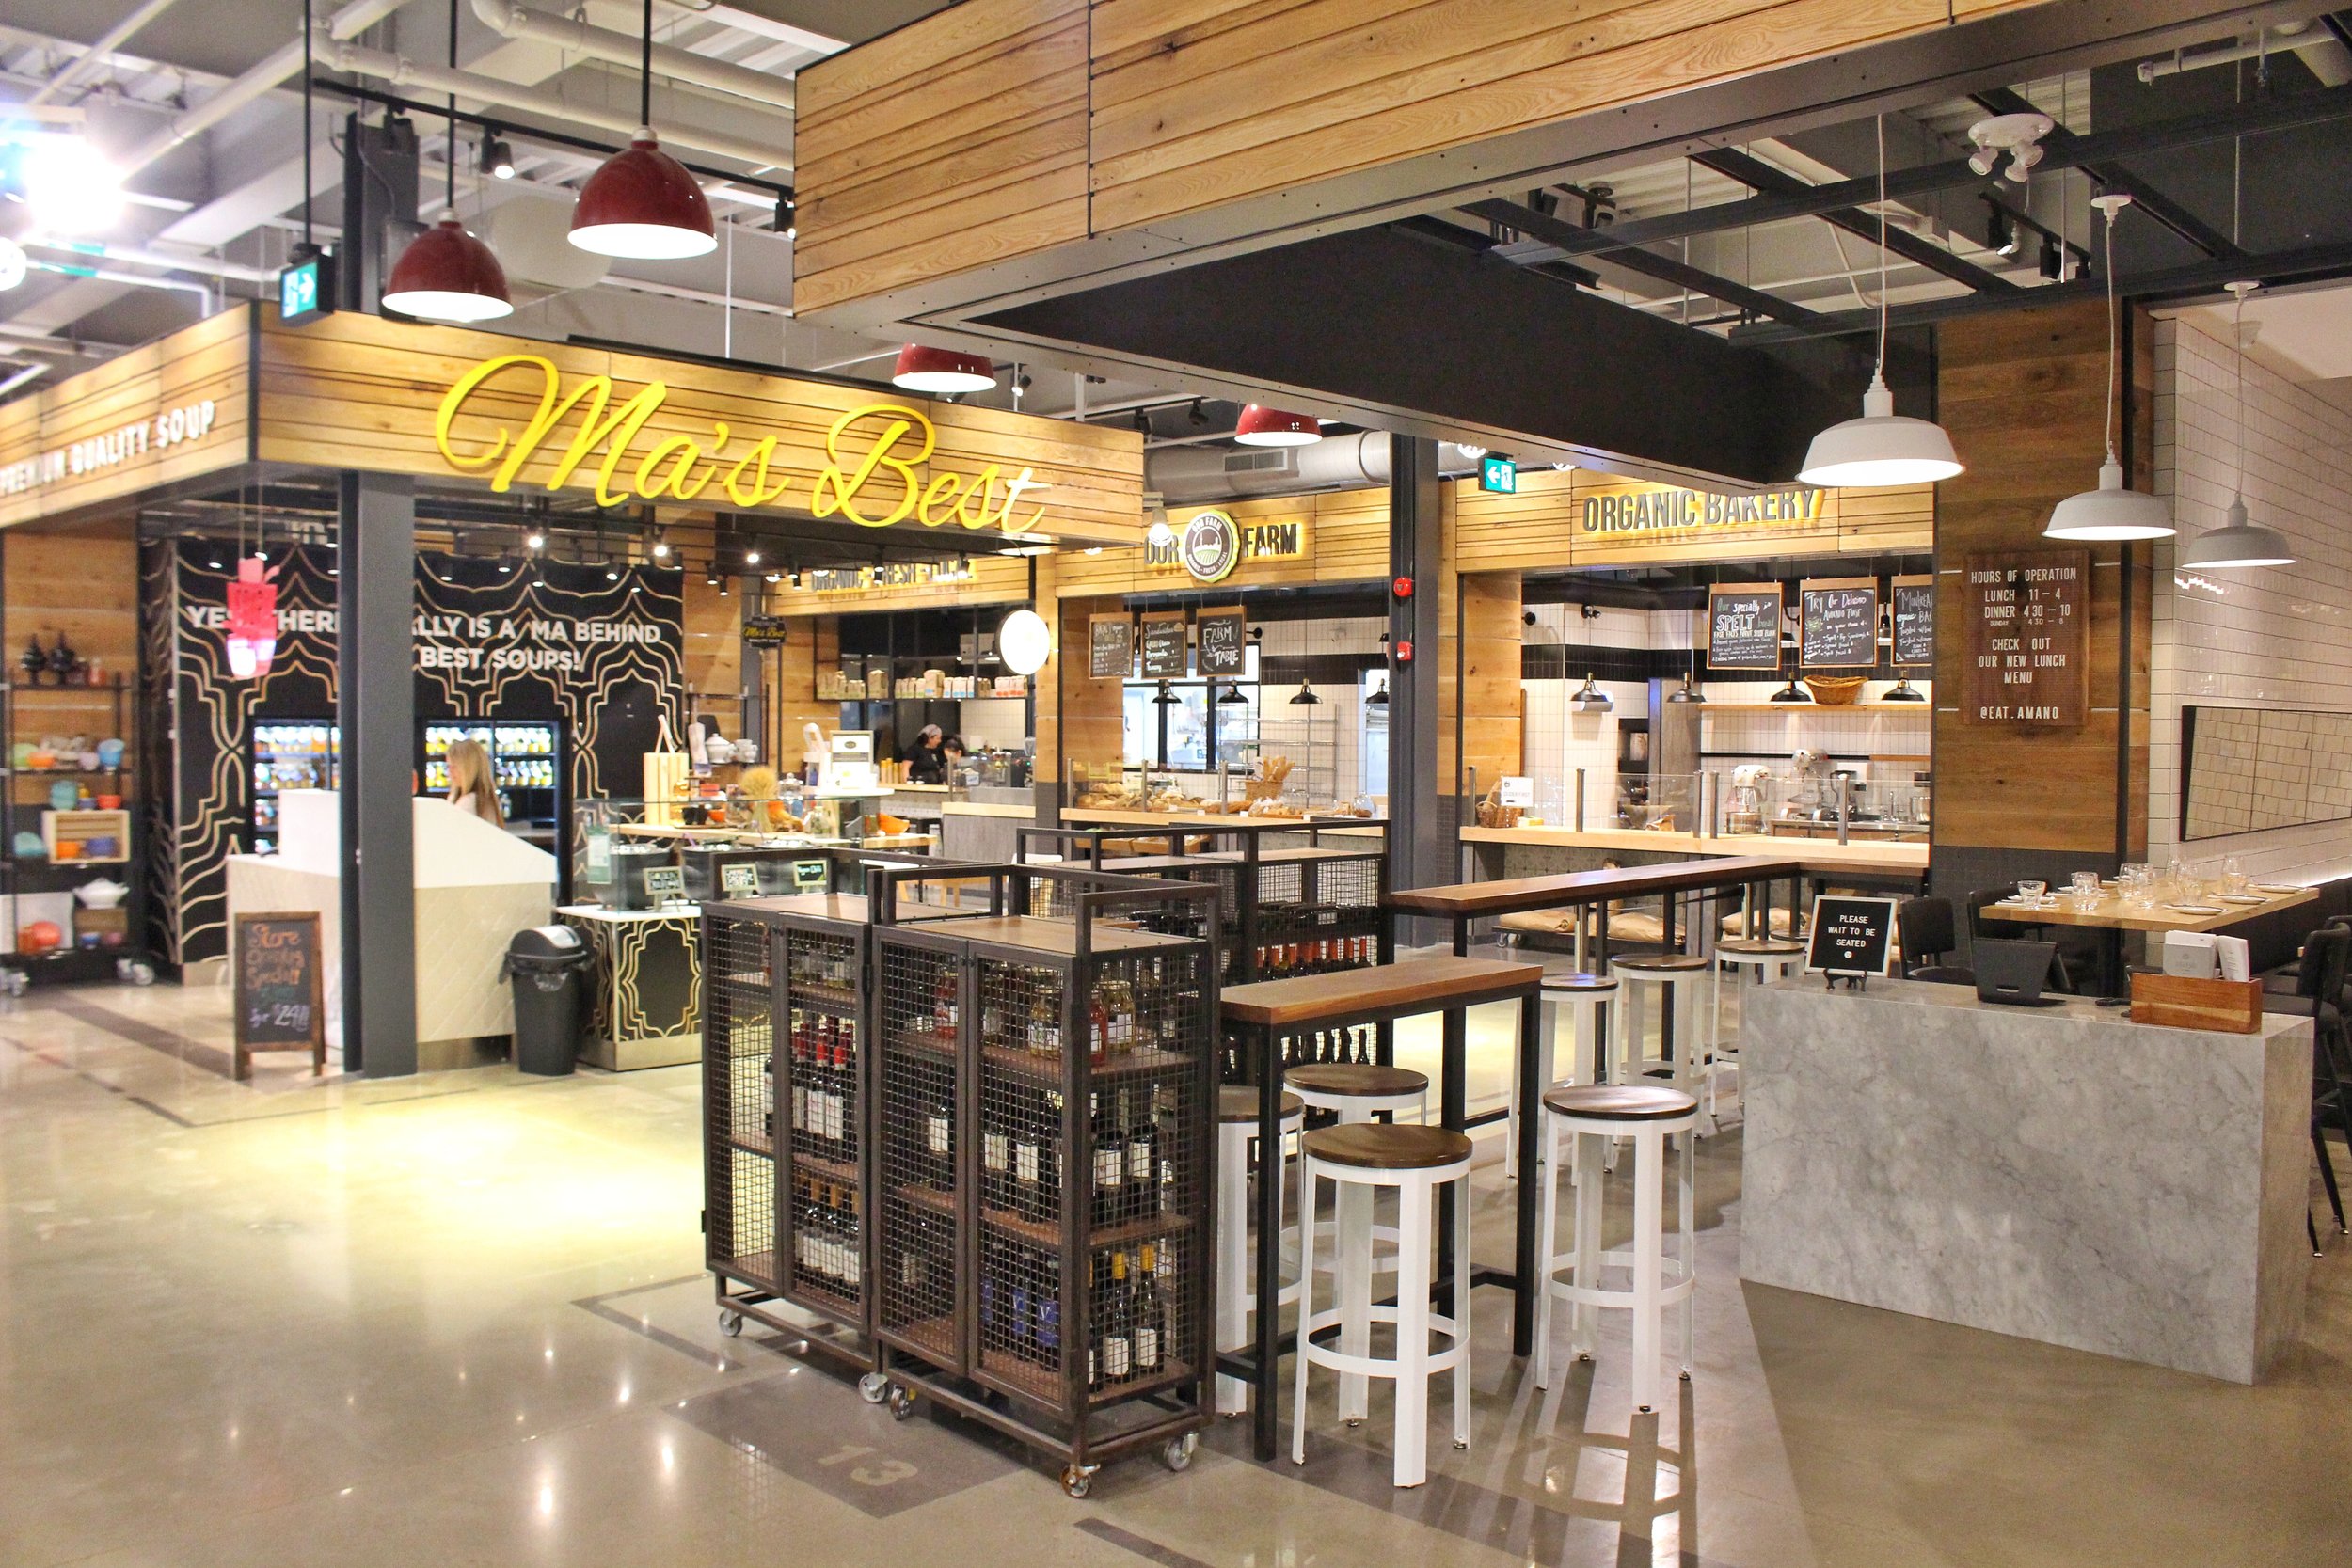
I’ve done my fair share of food experiences over these last five years since I started The Everyday Foodie. From visiting food halls, farmer markets, restaurants, cafes, and grocery stores I’ve seen them all, but not many stood out to me and left an impression quite like my visit here to Market & Co inside Upper Canada Mall in Newmarket, Ontario. I really didn’t know what to expect at first coming here because to be honest I wasn’t 100% sure what this was. Was it a food court? Was it a restaurant or a grocery store? Or was it a space where people gather here for workshops and unique events? I’ve soon found out that Market & Co encompasses all of that and more!

IMG_1127-01.jpeg
IMG_1157-01.jpeg
IMG_1158-01.jpeg
IMG_1159-01.jpeg
IMG_1160-01.jpeg

The second you walk through those doors, you are immediately greeted my a bright and large indoor space where a combination of your local baker, butcher, seafood market, produce, flower shop, and trendy restaurants are all rolled into one curated market. It’s a one-stop shop for all your food and culinary needs with 20 best-in-class artisans and merchants ready to satisfy your every need (click HERE to view a list of all of the current artisans and merchants at Market & Co). There is literally something for everyone here. If you have a sweet tooth like me there is even a section that you can literally find any candy you ever wanted imaginable. It’s nuts!

IMG_1161-01.jpeg
IMG_1162-01.jpeg

With that being said, Kitchen & Co is probably my most favourite part of this space. It’s a contemporary kitchen space and demonstration area in the heart of the market offering fun and educational opportunities for guests to cook, create, learn, and enjoy all the food and ingredients offered inside the market. It’s a community hub like no other, offering all kinds of weekly workshops, tastings, and activities that guests can sign-up on their website to register for interactive food experiences. Some examples of their classes include:

  • Oysters 101 & Tasting with World Record Holder “Shucker Paddy”

  • Thanksgiving Centrepiece Workshop

  • Master The Ultimate Bakery Style Cupcake

  • Create a Swoon Worthy Charcuterie and Cheese Board

  • Pasta Making with Acclaimed Chef Michael Angeloni

This is just a very small sample size of the types of classes Kitchen & Co offer year round. For me personally with so many unique and fun classes they were offering, it was hard to choose which first class I would be interested in attending when browsing through their schedule. Scanned the calendar a little bit more and bingo! The “Brew Your Own Kombucha Workshop” was calling my name!

Hosted by Village Juicery and certified Holistic Nutritionist Danielle Wiens, this 1.5 hour workshop was a step-by-step class on learning to brew kombucha at home!

IMG_1132-01.jpeg
IMG_1139-01.jpeg

So what is Kombucha?

Kombucha is a probiotic beverage, created through an ancient process of adding a SCOBY (symbolic community of bacteria & yeast), often referred to as “the mother” to sweet black tea. This living bacteria consumes the sugars within the tea (aka it ferments), leaving behind all kinds of compounds that are renowned for their health benefits including probiotic bacteria and several types of organic acids.

The moral of the story that we were taught in the workshop is basically to not like the SCOBY die! Feed it, nourish it, check up on it. Think of it as a new pet you inherited. Pet SCOBY! Without a living SCOBY there is no kombucha to brew. No pressure right?

Brewing kombucha at home is a two step fermentation process that takes around two weeks to complete from start to finish. As this is a living beverage, once you have your first successful brew under your belt, you’ll be able to use that SCOBY to brew literally endless kombucha at home. Follow these steps I learned here at the “Brew Your Own Kombucha Workshop” and you’ll be an expert at making your own kombucha at home in no time.

IMG_1141-01.jpeg

STEP 1: The 1st Ferment

Purpose:

  • To start new batch

  • Create fermentation

  • Grow your SCOBY so you can share it with others

What You’ll Need:

  • 1 black tea bag

  • 1/4 cup of organic sugar

  • 1 SCOBY

  • 1 brewing vessel (eg. glass jar)

Directions:

  1. Brew black tea in filtered water (1 tea bag + 1/4 cup of organic sugar per litre - don’t mess with this ratio!)

  2. Let it sit and adjust to room temperature (5 hours/overnight).

  3. Add piece of SCOBY, it can be any size, usually 3” is a good start. It will grow to cover the surface of your brewing vessel.

  4. Ferment for 7 - 10 days. Try after 7 days and decide when to start second ferment. The sweeter the final product, the less it needs to be fermented. The more sour/fermented it tastes, the longer you should ferment it for. It’s all your preference!

IMG_1154-01.jpeg

STEP 2: The 2nd Ferment

Purpose:

  • To add carbonation, C02

  • Add flavour

  • Bottle it up

What You’ll Need:

  • Glass bottles

  • Sugar and water to make simple syrup

  • Herbs of your choice

  • Strainer and funnel for bottling

Directions:

  1. Make Simple Syrup

    • 1 cup of sugar to 1 cup of water with optional unlimited herbs and roots of your choice

    • Add sugar, water, and optional herbs of your choice into pot

    • Let simmer allowing sugar to melt

    • Bring heat down to low temperature & cover

    • Let herbs sit in sugar/water to allow for the absorption of flavour

  2. Remove SCOBY by hand or with wooden spoons, and add to your SCOBY hotel (another glass vessel to temporarily stow it in).

  3. Strain kombucha into other vessel

  4. Bottle kombucha liquid into glass bottles

  5. Add 2 TBSP of simple syrup (carefully measured)

  6. Cap off sealed tight

  7. Ferment outside of fridge, at a moderate temperature, away from the sun for 2 - 3 days

  8. Place in fridge after 2 - 3 days to stop fermentation

  9. Enjoy!

IMG_1237-01.jpeg

Tips of Kombucha:

  • Bacteria is boss, everything we do in kombucha is to nourish and cultivate the yeast & bacteria cultures

  • Only use wood & glass utensils. Never allow metal to come in contact with your kombucha. It will affect the bacteria and kill the SCOBY.

  • Drop the soap! Never use soap in your vessel or on wooden spoons. Just use hot water to clean as an alternative.

  • Use filtered water & organic ingredients as fluoride, chlorine, or other commonly used chemicals can change the bacteria/yeast symbolic relationships

  • Temperatures matter. Fermentation ideally occurs between 23 - 29 degrees celsius. Temperature will also affect carbonation and flavour.

It’s amazing how much I’ve learned in just a short time at Market & Co. It’s not just about the food and drinks here, but obtaining more knowledge and a new skill set is what makes this place worth coming back over and over again. To see what upcoming classes are being offered at Market & Co that you may be interested in, click HERE to visit their calendar page and register your spot before they fill up! Share in the excitement with all your friends and family inside Market & Co at Upper Canada Mall to buy, learn, eat, and celebrate all of the delicious and amazing food it offers.

Grab & Go Four Ingredient Turkey Bacon and Egg Breakfast Cups Recipe - Cooking with Lilydale Part 2

The birthday celebrations just keep on going! If you've read my last recipe post you'll know exactly what I'm talking about. If not (no judgement here, everyone's busy) so let me give you a quick recap of exactly whose birthday we've been celebrating over here at The Everyday Foodie. It's Lilydale! Canada's premier poultry provider is celebrating its 75th anniversary this year, and there's no better way to celebrate one's birthday than by tearing up the kitchen and making some kick-ass food!

I've been busy creating some recipes with some of my favourite Lilydale products to celebrate this milestone, and today I'm going to share with you a dish for my personal favourite meal of the day.... breakfast!

  • If you missed my Pineapple Chicken Fried Rice with Turkey Sausage recipe I created last time with Lilydale you can check it out here. It's the perfect dish for lunch and/or dinner, and having it served inside a pineapple shell turns an average fried rice dish into a showstopper.

But back to this week's breakfast recipe that incorporates something that everyone loves to eat. BACON. Am I right? You can't have a proper breakfast without having bacon somewhere in the dish, yet many people do and who can fault them? Most of the time people will avoid having bacon for health reasons, which is perfectly understandable in my mind. With all the calories and fat involved even I tend to avoid it as much as I can for the sake of my arteries. Good news though. I found a solution! Going through all the products Lilydale offers I found the perfect substitute to regular pork bacon.

IMG_9289-01.jpeg

TURKEY BACON.

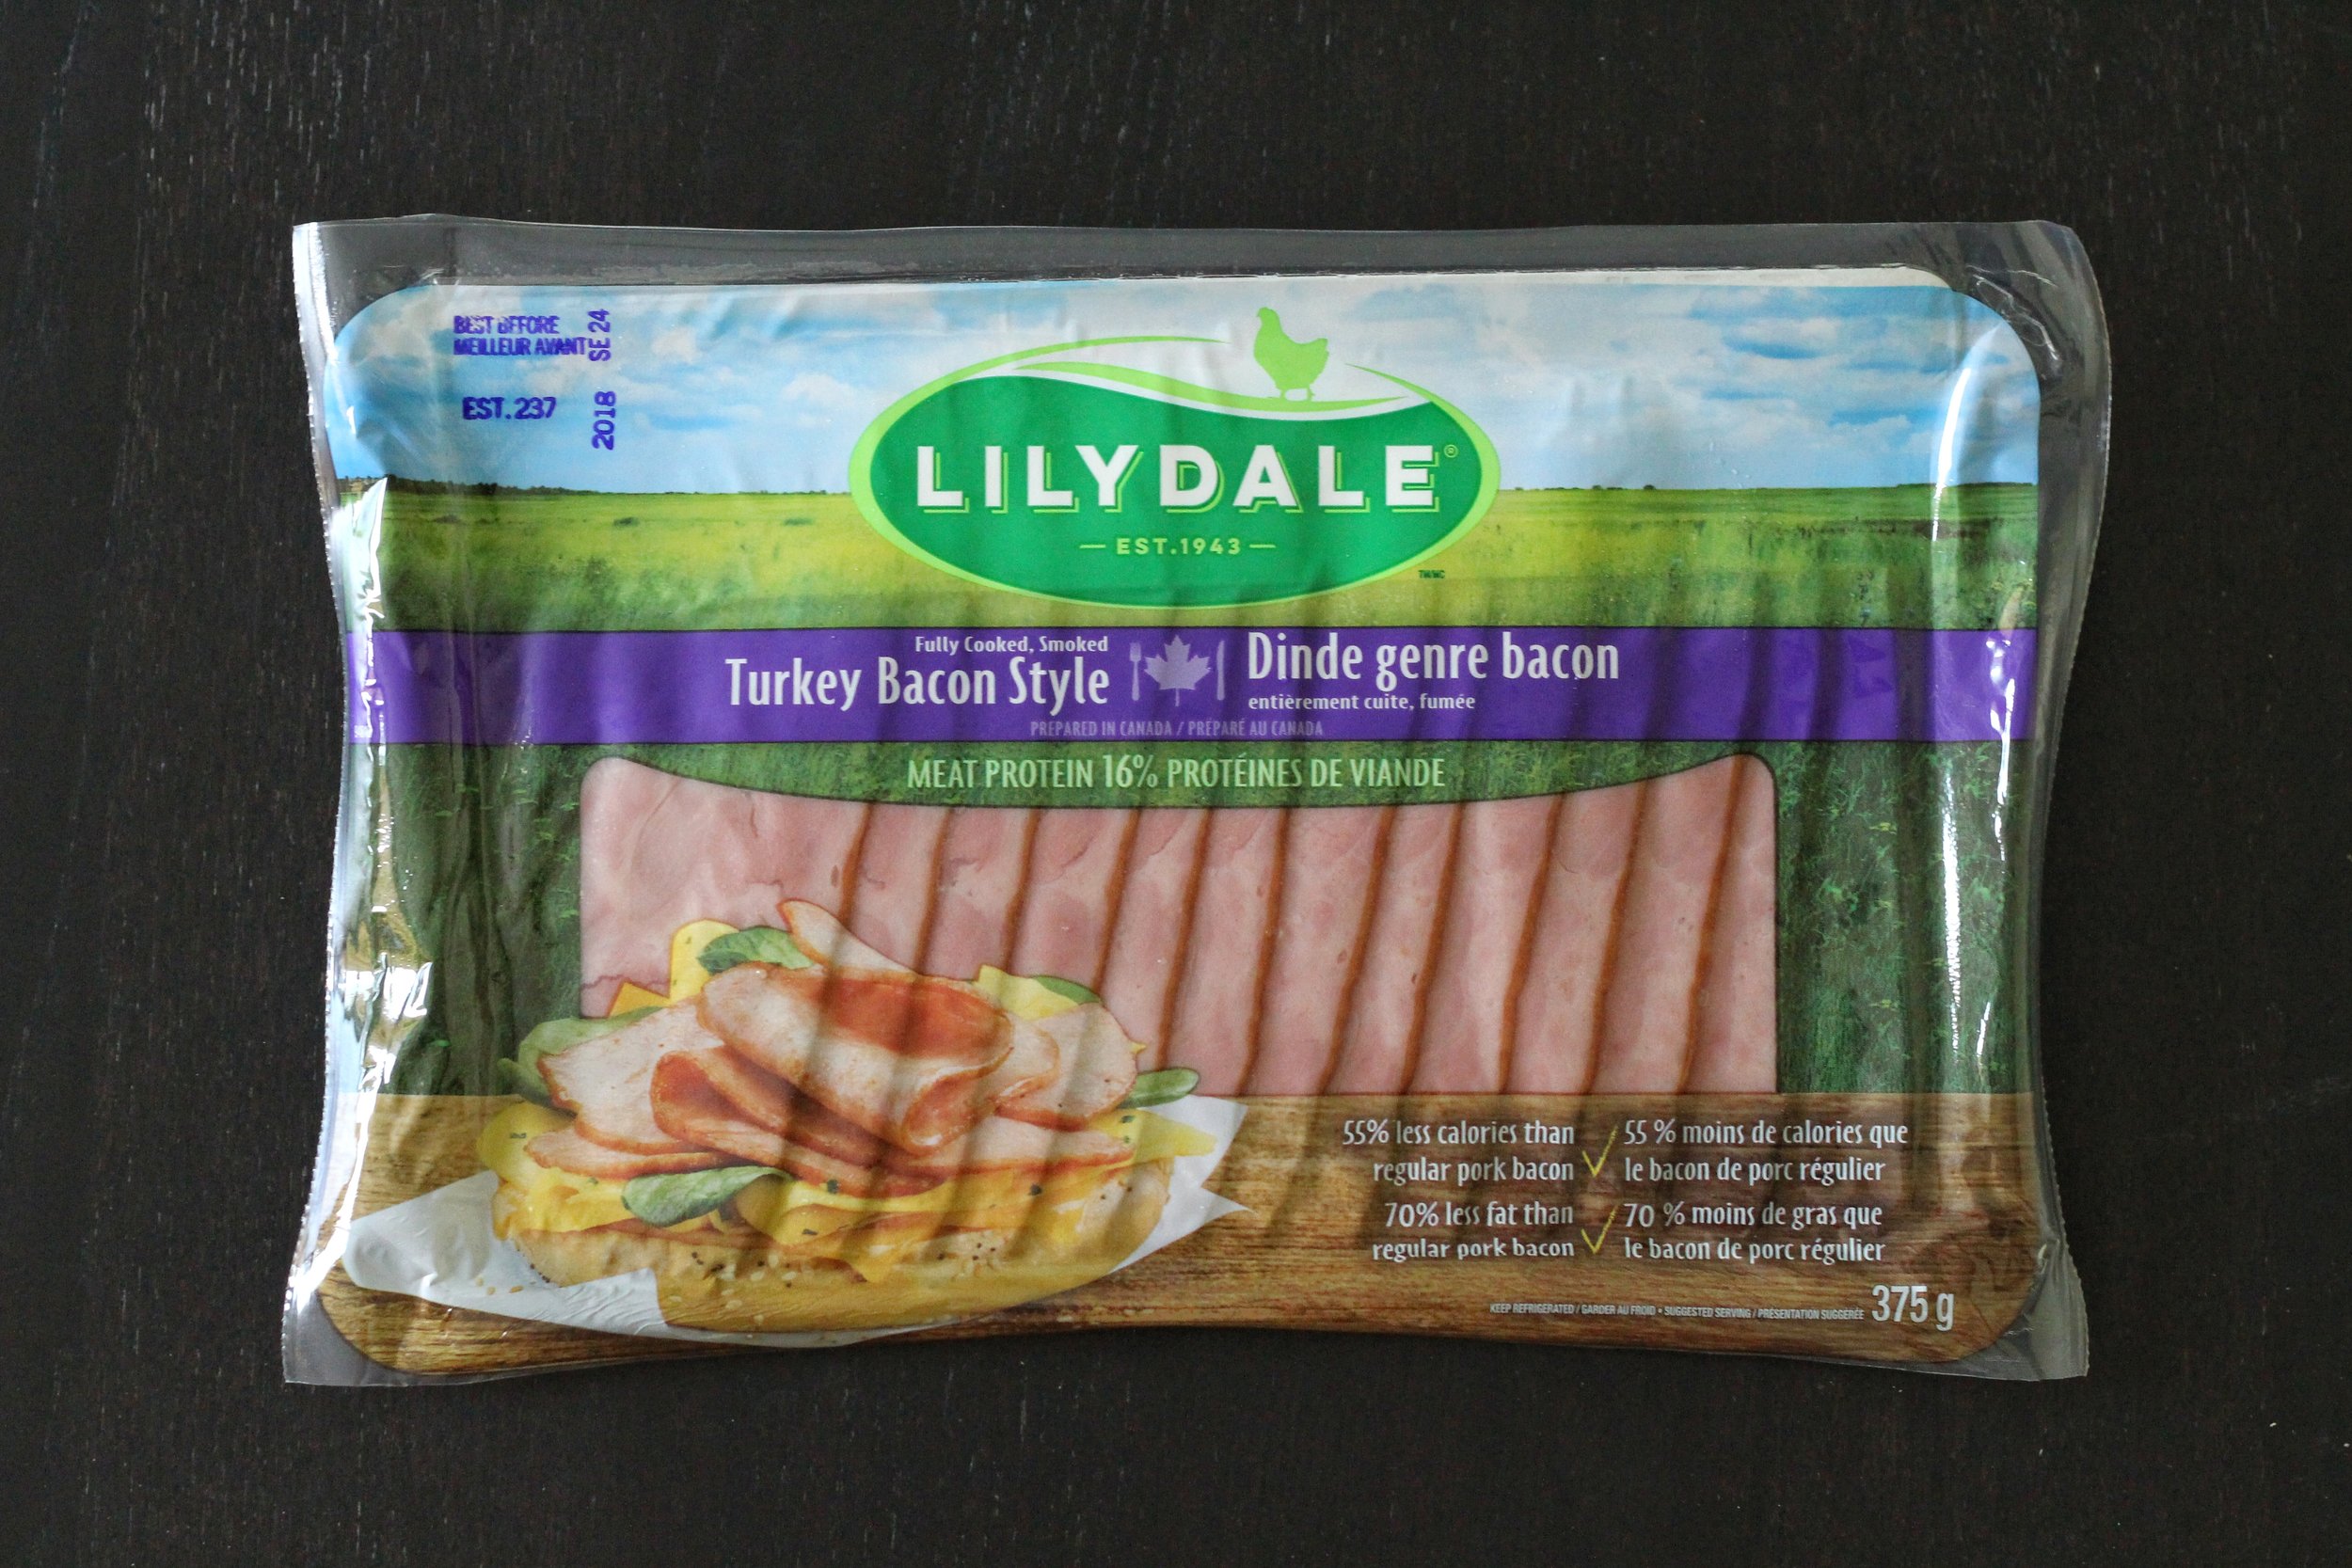
Lilydale Turkey Bacon - 70% less fat and 55% less calories than regular pork bacon.

Lilydale Turkey Bacon - 70% less fat and 55% less calories than regular pork bacon.

With 55% less calories and 70% less fat than regular pork bacon, Lilydale's Turkey Bacon is the perfect way to still cook up that bacon smell in the morning, and then indulge in it without any of the guilt.

Bacon and eggs are a breakfast classic, and I wanted to find an easy and fun way to enjoy them together in a non-traditional way. Turkey bacon is already pretty non-traditional, and so is.... a muffin pan. Yes, that's right you will need a muffin pan for this recipe because all of the whopping four ingredients needed for this recipe will be structured inside this muffin pan to create that cup shape we're aiming for. Once it gets baked in the oven, just like an ordinary muffin you can easily take it to go and eat it while you're on the move. Check out my recipe below and let me know what you think!

IMG_9291-01.jpeg

Grab & Go Four Ingredient Turkey Bacon and Egg Breakfast Cups

Prep Time: 20 minutes
Cook Time: 25 minutes
Total Time: 45 minutes
Servings: 6

Ingredients:

1 red potato, sliced 1cm thick, rounded ends discarded
1 small red pepper, finely chopped
1 package of Lilydale Turkey Bacon Style (12 strips total)
6 eggs
Salt and pepper to taste
Thyme, oregano, or chives to garnish (optional)

Directions:

1) Pre-heat the oven to 400 degrees F.
2) Grease up your muffin pan. In my opinion I would also recommend using paper baking cup liners on top of that. This not only allows you to easily take out the finished dish at the end, but it also ensures that all the ingredients (especially the runny egg) does not leak out.
3) Take 12 pieces of Lilydale Turkey Bacon out and cut 1/4 off each piece, as the standard size is too large in width.
4) Start to partially cook the Lilydale Turkey Bacon Style in a frying pan per package instructions. It should not be too crisp. We are just rendering a lot of the fat out of it, and it should still be pliable enough to wrap it inside the muffin pan without it snapping in half. Drain on paper towels and cool slightly.
5) Cut the potato in circles roughly the same size of the base of the muffin cup, about 1 cm in thickness and place one of them at the base of each muffin cup.
6) Fit two slices of Lilydale Turkey Bacon Style loosely around the sides of each cup, overlapping as necessary, lining the sides of the muffin cup to form the "cup."
7) Divide the finely chopped red peppers into six portions and then place a thin layer on top of the potato base in each muffin cup.
8) Finally, break the egg and add to the turkey bacon-lined cup on top of the red peppers and potato. Sprinkle the top of the egg with salt and pepper.
9) Bake at 400 degrees F for 15-20 minutes, or until the turkey bacon is cooked to crisp.
10) Run a spatula around the edges and remove to platter. Garnish as desired. Enjoy!

IMG_9313-01.jpeg
IMG_9330-01.jpeg